











User Manual · Original Instructions

Tabletop Seeder

Trays 1020, up to 3″ tall
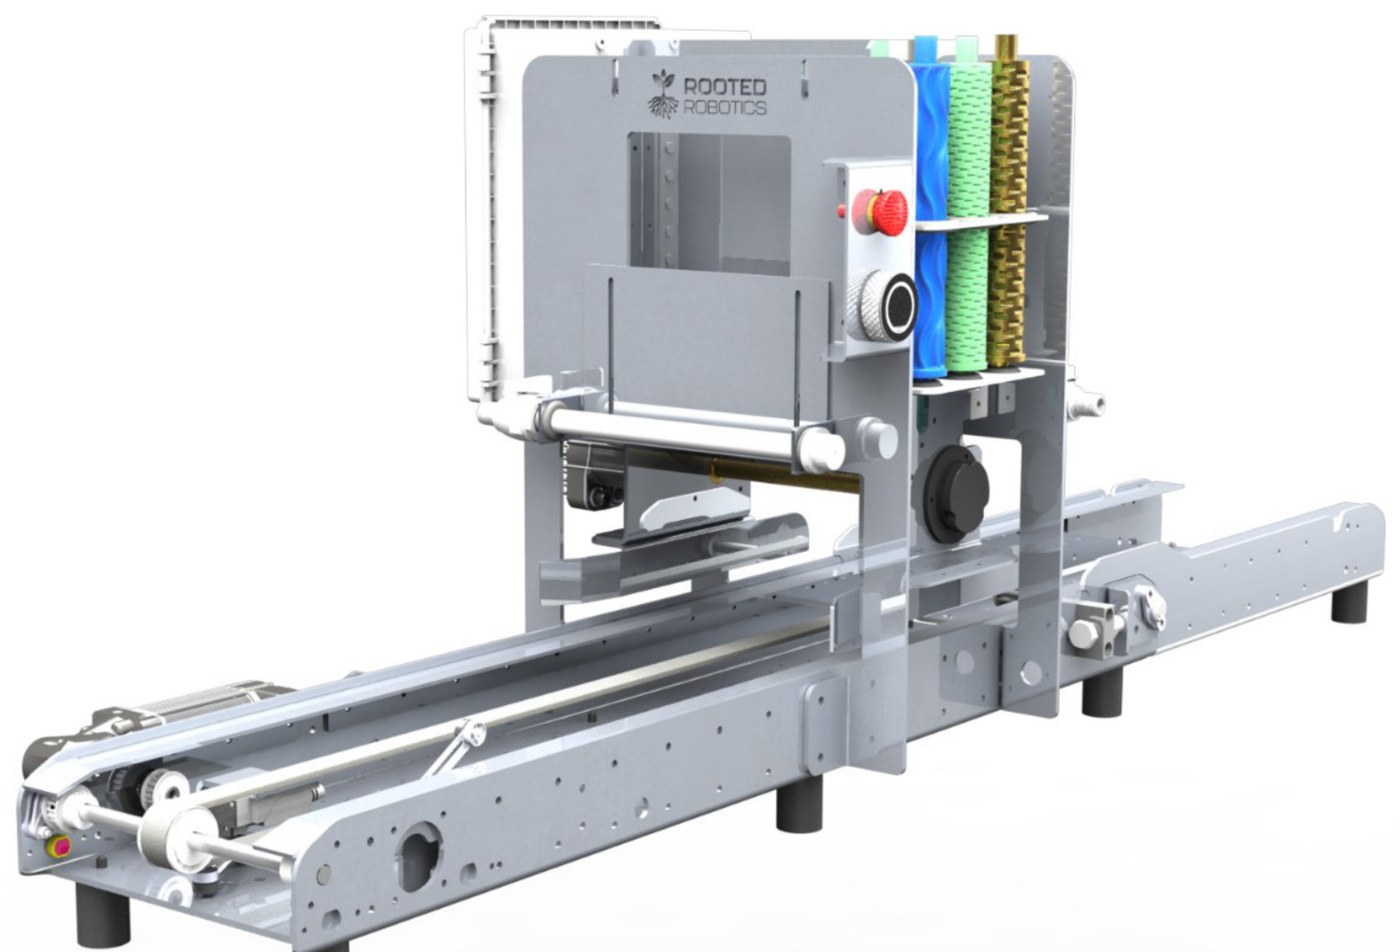
The Tabletop Seeder: seed hopper and control panel above the tray receiver, mounted on the drive unit and belt
Before you startPart 1 of 4

Introduction

Thank you for choosing the Rooted Robotics Tabletop Seeder. Designed with the small grower in mind yet effective for farms of all sizes, this machine brings precision, consistency, and ease to your microgreen and leafy green planting process. With accurate seed weight calibration, the Tabletop Seeder delivers uniform planting, resulting in increased yields through greater consistency across each tray. Its user-friendly design requires minimal training for staff, and the efficiency gained ensures a fast return on investment. Built with durable materials and customizable settings, this seeder is perfect for controlled environment agriculture and adaptable to diverse farm scales.

This manual will guide you through setting up the seeder, calibrating seed weights, choosing rollers, and using optional add-ons to further optimize your seeding process. With the Tabletop Seeder, you’ll achieve consistent, high-quality planting that saves time, reduces labor, and supports healthy crop growth.

Product overview

The Rooted Robotics Tabletop Seeder is a versatile and efficient solution tailored to streamline the seeding process for microgreens and leafy greens. Initially designed with small growers in mind, the seeder’s robust functionality and customizable settings make it an effective tool for farms of any size. The Tabletop Seeder arrives fully assembled, allowing you to start planting with minimal setup—simply open the electrical box, remove any packing materials, and plug it in to get started. By automating precise seed placement, the seeder reduces labor costs, improves crop consistency, and helps growers achieve higher yields, all while minimizing training time for staff.

Key benefits

Using the Tabletop Seeder brings a host of advantages to your operation, allowing for a quick return on investment and lasting improvements in planting efficiency and yield.

  • Fast ROI: With labor-saving automation and minimal need for training, the Tabletop Seeder enables growers to quickly recover their investment while freeing up valuable time for other tasks.
  • Increased Yield: Consistent, precise seed placement leads to uniform crop growth across trays, boosting yields and enhancing overall quality.
  • Reduced Training Requirements: The seeder’s intuitive controls mean that even new team members can get up to speed quickly, reducing the time and resources spent on staff training.
  • Durability for Long-Term Use: Built with durable materials to withstand controlled environment agriculture, the Tabletop Seeder ensures reliability and longevity for a variety of farm setups.

How this manual helps

This manual is your guide to getting the most out of the Rooted Robotics Tabletop Seeder. Inside, you’ll find step-by-step instructions for setting up your seeder, calibrating seed weights to your ideal specifications, selecting and using the appropriate roller for your seed type, and operating optional add-ons to further enhance your planting process. Following these instructions will ensure optimal performance, consistent results, and minimal downtime in your growing operation.

About us

Our skilled team of engineers, designers, and industry veterans is the Swiss-army knife of the indoor farming industry. With backgrounds in small to large scale farm operations, machine design, software, computer vision, and machine learning, we’re able to tackle the key problems that controlled environment agriculture farms face. Rooted in robotic automation, we provide affordable tools, technology, and insights that allow farm operators to strategically plan for a more profitable future enabled by intelligent and interfacing machines.

Intended use

The Tabletop Seeder is designed for seeding leafy greens, microgreens, and baby greens in standard 1020 grow trays (up to 3 inches tall) in controlled environment agriculture facilities.

Intended OperatorsTrained Adult operators in commercial agriculture settings.
Intended EnvironmentIndoor, dry, temperature-controlled facility with appropriate electrical supply.
Operating Limits110V AC (US), 230V AC (EU).
  • Do NOT operate with guards removed or safety devices disabled.
  • Do NOT use outdoors or in wet conditions.
  • Do NOT use with trays exceeding 3 inches in height or non-1020 format trays.
  • Do NOT operate the machine without reading this manual and watching setup videos.
  • Do NOT allow untrained or unsupervised persons to operate the machine.

Safety information

Signal Words and Symbols

DangerIndicates a hazardous situation that, if not avoided, will result in death or serious injury.
WarningIndicates a hazardous situation that, if not avoided, could result in death or serious injury.
CautionIndicates a hazardous situation that, if not avoided, could result in minor or moderate injury.

Residual Risk Warnings

  • Pinch points exist at the conveyor belt and rollers. Keep hands, hair and loose clothing clear of the belt feed area during operation.
  • The machine contains voltages up to 110V AC (US) or 230V AC (EU) internally. Do not open the control panel enclosure.

Recommended Personal Protective Equipment (PPE)

  • Safety Glasses for normal operation, cleaning with compressed air, cleaning with sanitizers.
  • Hearing protection for compressed air use.
  • Closed toed shoes for all stages of machine life cycle.

Emergency Stop

  • The E-stop button is located in the middle of the control panel, between the soft kill switch and the control dial. The e-stop has a bright red mushroom head with a yellow background making it easily identifiable.
  • To activate the E-stop, press it in firmly. Upon this press all motor power is cut from the machine. To reset the machine, twist the E-stop button clockwise to release. The machine will NOT restart automatically, the operator must initiate a deliberate restart sequence.
  • The E-stop should be used any time an unsafe condition is observed, when any injuries occur, or at any point the operator feels unsure about the machine behavior. The E-stop must also be activated for routine cleaning and maintenance.
Danger
Rooted Robotics — Seeder

Electrical hazard — do not operate machine with enclosure open

Risk of electric shock or electrocution. This enclosure contains energized electrical components carrying hazardous voltage. Contact with live conductors or terminals may cause electric shock, severe burns, or death.

Close enclosure before operating machine. The electrical enclosure must be fully closed and secured before starting or operating the machine. Do not run the seeder, conveyor, or any machine function while the enclosure is open.

Qualified personnel only. Only qualified electrical or service personnel authorized by Rooted Robotics may open this enclosure for troubleshooting, inspection, or repair. Refer to the instruction manual for the required lockout procedure before opening.

This label must remain affixed to the electrical enclosure and legible at all times. Do not obscure or remove.
Failure to comply may result in electric shock, electrocution, or death.

Warning
Rooted Robotics — Seeder

Live troubleshooting safety requirements

If live troubleshooting of the electrical enclosure is required by qualified service personnel, the following conditions must be met at all times while the enclosure is open:

Do not operate roller or conveyor. Do not run the seed roller, conveyor belt, or any mechanical function of the machine while the electrical enclosure is open. Live troubleshooting is limited to electrical diagnostics only. Operating moving components with the enclosure open creates simultaneous electrical and mechanical hazards that may result in serious injury or death.

Qualified personnel only. Live troubleshooting must be performed only by personnel qualified to work on energized electrical equipment and authorized by Rooted Robotics. The technician must use appropriate personal protective equipment (PPE) including insulated tools and, where applicable, voltage-rated gloves.

Keep unqualified persons clear. All other personnel must remain clear of the machine and the open enclosure during live troubleshooting. Establish a safe perimeter and ensure no untrained persons can inadvertently contact exposed conductors or operate machine controls.

Close enclosure before resuming operation. Upon completion of troubleshooting, fully close and secure the electrical enclosure before returning the machine to normal operation. Verify that all covers, fasteners, and cable entry seals are properly reinstalled.

Failure to follow these requirements may result in electric shock, electrocution, entanglement, or death.

Transport, handling and storage

  • Always use designated lifting points and grip locations.
  • Machine mass: 55 - 77 lbs (25 - 35 kg) – requires minimum two (2) people and/or mechanical aid to lift.
  • Dimensions: 51 x 36 x 36 in (1295 x 915 x 915 mm)
  • WARNING: Sharp edges inside packaging – wear cut resistant gloves during unpacking and setup.
  • Stability requirements for work surface: minimum surface dimensions, weight capacity >100 lbs, level, non-slip.
  • Storage conditions: indoor, dry, ambient temperature.
  • Clear workspace of tripping hazards (packaging materials) before positioning machine.
Secure after placement

After placing the machine on the installation surface, verify that it is level and stable. If the machine is equipped with mounting holes or clamp points, secure it to the surface to prevent movement during operation. An unsecured machine may shift, vibrate off the surface, or tip during use. Failure to follow these requirements may result in serious musculoskeletal injury, crushing hazards, equipment damage, or tipping during operation.

Warning

Heavy equipment — risk of serious injury

Minimum two-person lift required. Do not attempt to lift, move, or reposition this machine alone. A minimum of two (2) persons is required for all lifting and handling operations.

Use mechanical transport where possible. Use an appropriately rated hand truck, cart, or dolly whenever transporting this machine. Verify that the transport device is rated for the weight of the machine before use.

Use proper lifting technique. Bend at the knees, keep your back straight, and grip the machine at designated lift points only. Do not twist while lifting. Ensure firm footing and a clear path before moving.

Check weight before handling. Machine weight is clearly marked on the equipment nameplate and on the exterior of the shipping packaging. Refer to the weight marking before any lifting or transport operation to ensure adequate personnel and equipment are available.

Failure to follow these instructions may result in serious musculoskeletal injury, crushing hazards, or damage to equipment.

Workstation

  • The Operator(s) for the Tabletop Seeder machine should place the seeder at a comfortable working height, with the tray intake belt located around waist level. Ensure the seeder is located on a stable surface.
  • The operator(s) should be located at the infeed side of the machine when loading trays into the seeder and the outfeed side when collecting the seeded trays.
  • When placing 1020 trays onto infeed belt, operator should NOT manually push trays towards the hopper, instead allowing the conveyor to catch trays and direct them towards hopper.
  • Allow multiple feet of space between the machine and all walls or other machinery to allow for smooth operation, maintenance and cleaning.
  • Before operation of the machine, ensure no untrained bystanders are in the operating zone of the machine.
Setting upPart 2 of 4

Setup and calibration

Before running your first batch, it’s important to calibrate your machine for your specific seed type and production needs. The Seeder uses a control dial that lets you fine-tune key settings such as belt speed, roller speed, and the watering features. While some variation in seed weight is normal—typically within ±5% of your target—our testing shows that even distribution and consistent spacing often lead to better germination and higher yields than hand-seeding. Some seed loss is expected with any automation system, but it’s typically very minimal compared to the amount of seeds that actually land on the tray. Once you’re dialed in, the Seeder will provide reliable, repeatable performance with minimal adjustment.

Seed Weight Calibration

  1. Choose and insert the correct roller based on your seed type.
  2. Load seeds into the hopper, ensuring the roller is fully covered. Some seed spillage at this stage is normal.
  3. Place an empty tray on the scale and tare it to zero. You can use a paper towel to help prevent seeds from bouncing out.
  4. Turn on the machine and use the dial to select the seed variety you are testing.
  5. Run the tray through the machine, collect the seeded tray, and weigh it.
  6. Using the “Edit” feature, adjust the speed until you achieve the target weight three times in a row for accuracy.

Watering Feature Calibration

  1. Connect your water source. Do not load seeds into the hopper during this test.
  2. If using the Booster Pump Add-On, ensure the intake line is fully submerged. Run the machine and check for smooth, continuous flow—if the pump sputters, increase the flow using the dial on the pump body.
  3. Place a tray with media (or towels/absorbent material) on the belt.
  4. Select the seed variety you plan to run, and start the machine. The watering bar will turn on and off automatically based on belt speed.
  5. Observe water coverage. Use the dial to fine-tune the watering bar’s start and stop time if needed.
  6. For precise water amounts per tray, weigh the tray before and after watering. Adjust the needle valves or belt speed until you achieve the desired weight consistently.
  7. Once flow is consistent and water volume is dialed in, you’re ready to begin seeding.

Roller types and seed compatibility

XS seedsuse for: arugula, broccoli, basil, mustard, amaranth
XS seed roller
Small seedsuse for: brassicas, broccoli, kale, arugula, mustard
Small seed roller
Medium seedsuse for: larger brassicas, cabbage
Medium seed roller
Large rolleruse for: radish
Large roller
XL rolleruse for: cilantro
XL roller
Largest rolleruse for: beets, bulls blood
Largest roller, with wave-shaped grooves
Soft rolleruse for: peas, chard, and other odd shaped large seeds
No image
OperatingPart 3 of 4
Reference

Every screen

Screens are numbered here for reference within this manual.

Loading screen
1Loading Shown while the machine boots
Belt Speed screen
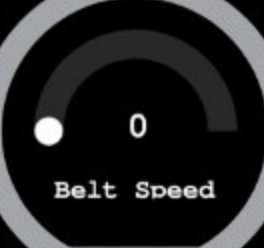
2Belt Speed How fast the tray moves
Roller Speed screen
3Roller Speed How fast the seed roller turns
Save Settings screen
4Save Settings Store your changes, or return to the menu
Variety Preset screen with Edit and Select
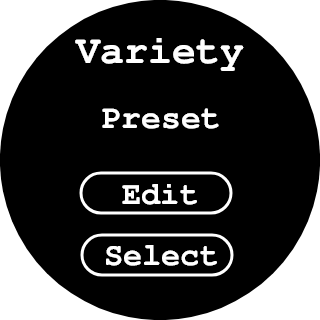
5Variety Preset Choose a variety, then Edit or Select
Watering Start screen
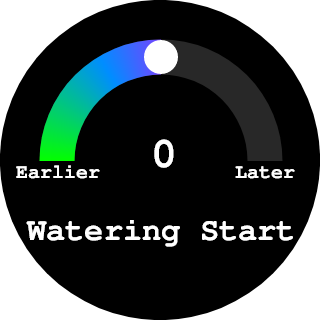
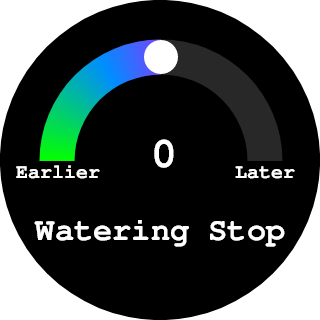
6Watering Start When the watering bar switches on
Watering Stop screen
7Watering Stop When the watering bar switches off
Misting Start screen
8Misting Start When the misting bar switches on
Misting Stop screen
9Misting Stop When the misting bar switches off
Roller Start screen
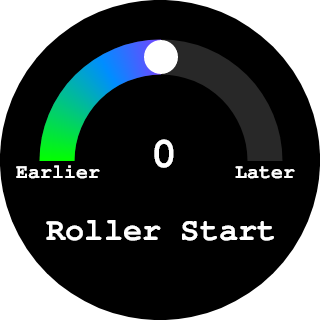
10Roller Start When the seed roller starts
Roller Stop screen
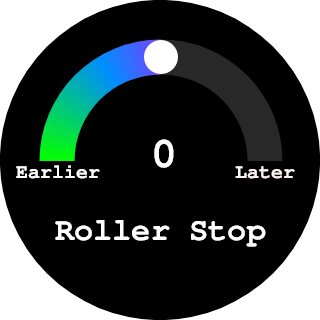
11Roller Stop When the seed roller stops
Variety Preset Selected confirmation
12Variety Preset Selected! Confirming your choice
Variety Preset Selected screen with Menu
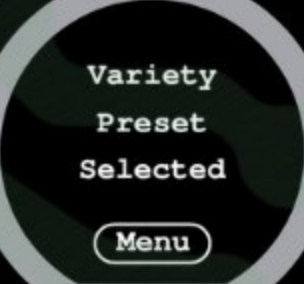
13Variety Preset Selected Ready to seed
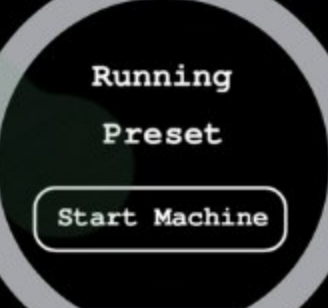
Running Preset screen with Start Machine
14Running Preset Start and stop the belt

Getting to know your control dial

  1. Loading screen when machine turned onThis screen only shows when the machine is booting up. It usually takes less than a minute to boot.
  2. Variety select/editPress the select button to use this variety preset or press the edit button to adjust the settings for that variety.
  3. Variety selection confirmationYour variety is selected and you are ready to seed when the second screen loads.
  4. State screenSwiping up from the variety select/edit screen will bring you to the state screen. From here you can view which preset is being ran, if the belt is running. Clicking start and stop machine will pause the belt, and resume it.
Variety Preset screen with Edit and Select buttons

Edit settings

Each setting has its own screen. Rotate the dial to change the value in the middle, then save your changes on the Save Settings screen.

Roller Speed screen

Spin speed of the seed roller

Rotate the dial to adjust the roller speed, with settings ranging from 0 to 50. Increasing the roller speed will dispense more seeds.

Speed of the belt that moves the tray

Rotate the dial to adjust the belt speed, with settings ranging from 0 to 25. Increasing the belt speed will result in fewer seeds being collected at the same roller speed.

ScreenSettingWhat it does
10 Roller Start Rotate the dial to adjust when the roller starts. Some trays are slightly different sizes. This allows you to reduce seed spillage by starting the seed roller at the right moment.
11 Roller Stop Rotate the dial to adjust when the roller stops. This allows you to reduce seed spillage by stopping the seed roller at the right moment.
6 Watering Start Rotate the dial to adjust when the watering starts. Some trays are slightly different sizes. This allows you to reduce water spillage by starting the watering bar once the tray is directly below it.
7 Watering Stop Rotate the dial to adjust when the watering stops. Some trays are slightly different sizes. This allows you to reduce water spillage by stopping the watering bar right before the back of the tray passes underneath it.
8 Misting Start Rotate the dial to adjust when the misting starts. Some trays are slightly different sizes. This allows you to reduce water spillage by starting the misting bar once the tray is directly below it.
9 Misting Stop Rotate the dial to adjust when the misting stops. Some trays are slightly different sizes. This allows you to reduce water spillage by stopping the misting bar right before the end of the tray passes underneath it.

Save settings or return to menu

Use this screen to save your current settings or return to the menu. Tap “Save Settings” to store your adjustments, or select “Menu” to go back without saving.

Save Settings screen
Care and referencePart 4 of 4

Cleaning procedures

Danger
Rooted Robotics — Seeder

Unplug before cleaning

Risk of electric shock or electrocution. This machine must be completely disconnected from the power source before any cleaning, washdown, or sanitation procedure. Cleaning a machine that is connected to power creates a risk of electric shock, electrocution, or death.

Never use water near this machine while plugged in. Do not spray, splash, wipe with wet cloths, or allow any water or liquid to contact any part of this machine while the power cord is connected to an outlet. Water contact with an energized machine may cause electric shock, short circuit, fire, or death.

Verify power is off. After unplugging the machine, confirm that the control dial display is completely dark and shows no illumination. If the display remains lit after unplugging, stop immediately and do not proceed with cleaning. Contact Rooted Robotics service.

This label must be placed in the operator’s direct sightline and remain legible at all times. Do not obscure or remove.
Failure to comply may result in electric shock, electrocution, fire, or death.

Warning
Rooted Robotics — Seeder

Mandatory lockout procedure before cleaning

Complete all steps in order before beginning any cleaning, washdown, or sanitation procedure:

  1. Press the Emergency Stop (E-Stop) button to immediately de-energize the machine.
  2. Unplug the machine. Disconnect the power cord from the wall outlet or supply receptacle. Do not rely on the E-Stop alone.
  3. Verify power is off. Check that the control dial display is completely dark and shows no illumination. A dark display confirms the machine is fully de-energized. If the display remains lit, stop and do not proceed — contact Rooted Robotics service.
  4. Wait for all moving components (conveyor, rollers) to come to a complete stop.
  5. Proceed with cleaning only after confirming: (a) the power cord is disconnected, (b) the control dial display is dark, and (c) all moving components are stationary.

Never use water near this machine while plugged in. Water contact with an energized machine creates an immediate risk of electric shock, electrocution, short circuit, or fire. If water has contacted the machine while it was plugged in, do not touch the machine. Disconnect power at the breaker panel and contact Rooted Robotics service before resuming use.

Failure to complete this lockout procedure before cleaning may result in electric shock, electrocution, fire, or death.

Purpose

Keep all seed-contact and tray-contact surfaces visibly clean during use and thoroughly cleaned after use to protect product quality and consistent metering.

Approved agents and methods

  • Use potable water, food grade detergents, peroxide or peracetic acid based sanitizers per label.
  • Do not use chlorinated cleaners.
  • Wipe or hose with a handheld nozzle. Do not use a pressure washer.

Routine cleaning during operation (every 250 trays)

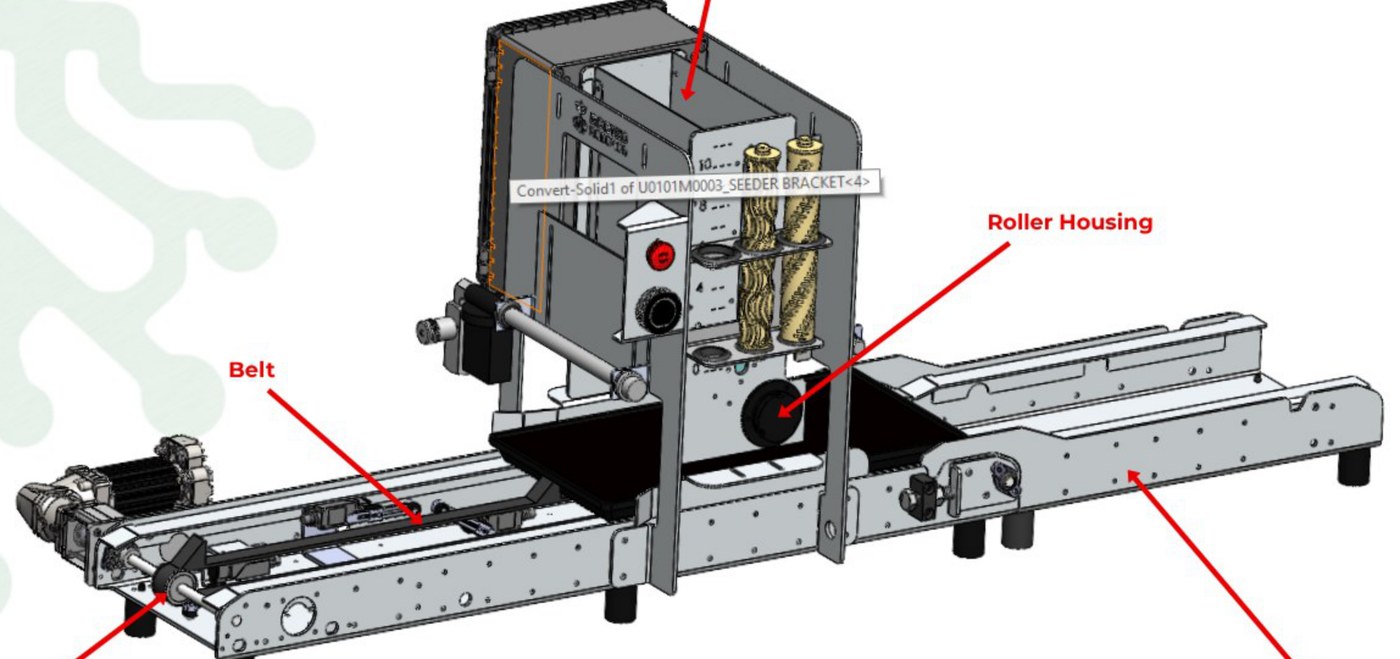
The seeder with the hopper, roller housing and belt labelled
The parts to keep clear of seed dust: the hopper, the roller housing and the belt path.
  • Keep the hopper rim, roller cavity, tray receiver, and belt path free of seed dust and fragments.
  • Wipe the selector dial and tray sensor window as needed to maintain reliable detection.
  • Clean conveyance belt and pulleys, keep the belt moving and spray with compressed air or a water hose on jet mode to flush debris out of belt and pulley teeth.
  • Avoid getting water into the hopper, roller cavities, or onto dry seed. Resume seeding only after all these components are dry.
Caution

Always be sure that the e-stop is engaged and the power is unplugged before attempting to perform inspection and maintenance.

End of day cleaning

  1. Disconnect power.
  2. Empty seed from the hopper. Store seed in labeled containers.
  3. Remove seed rollers and the roller quiver. Wipe all parts; if washing, rinse, sanitize if desired, and dry completely before reassembly.
  4. With the belt running, spray the belt with a hose on jet mode to clear dust from the running surface and underside.
  5. Hose the tray receiver and drive unit tray path. Avoid direct spray into motor housings and the electronics box.
  6. Wipe exterior panels, touch points, and the selector dial.
  7. If using additives/chemicals with watering add-ons, flush lines with clean water for at least 60 seconds, then relieve pressure and allow residual water to purge.
  8. Allow components to air dry fully before loading seed.

Deep cleaning (as needed)

  1. Hose the machine with potable water using a handheld nozzle, then use compressed air to dislodge trapped debris and speed drying. Avoid directing water or airflow into motors, bearings, or the electronics box. Do not use a pressure washer.
  2. Detension the main conveyance belt enough to remove it from the pulleys, then scrub the pulleys and the belt; clear embedded debris, reinstall the belt, tension to spec, and verify tracking.
  3. Remove and individually clean seed rollers; ensure they are fully dry before reinstalling.
  4. Inspect and clean drain paths so water cannot pool.

Do and do not

  • Do keep food contact parts clean before, during, and after operation.
  • Do run the belt while spraying it to move debris off.
  • Do avoid direct spray at bearings, motors, and the electronics box.
  • Do not use chlorinated cleaners.
  • Do not use a pressure washer.

Maintenance and replacement intervals
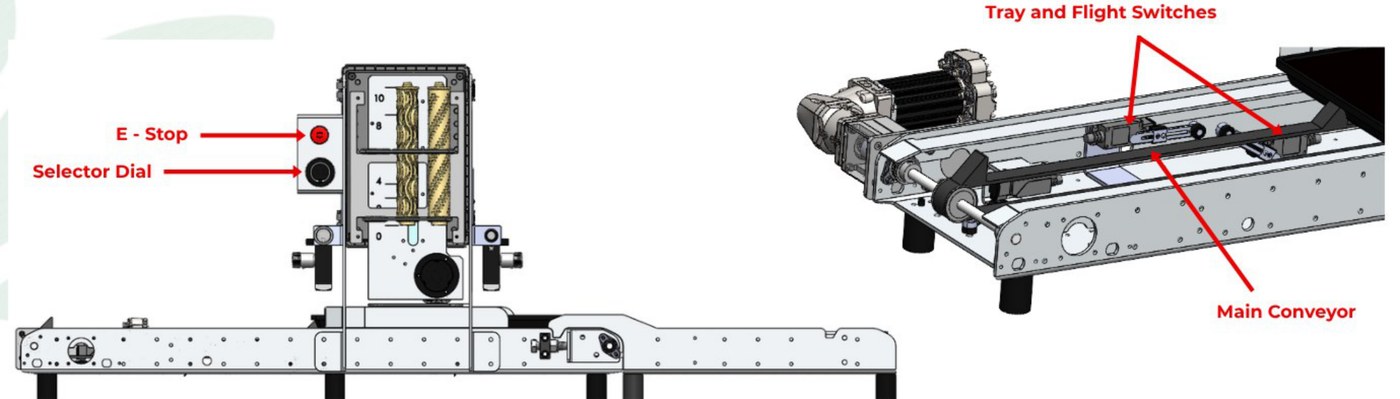
The seeder with the E-stop, selector dial, tray and flight switches and main conveyor labelled
What to check before each use: the E-stop and selector dial on the control panel, and the tray and flight switches along the main conveyor.
Before each use
  • Verify emergency stop and controls function.
  • Inspect main conveyance belt for cuts, fraying, glazing, splice damage, and proper tracking; adjust tension/tracking if needed.
  • Check tray sensor alignment and operation; if misreads persist check cable connections, realign or replace the sensor.
  • Inspect seed rollers for surface wear, nicks, swelling, or end-cap looseness; replace rollers that affect metering consistency.
  • Check fasteners on hopper, tray receiver, guards, and sensor brackets for looseness.
  • Inspect electrical connectors and at the selector dial, e-stop and both motors.
Weekly
  • Confirm belt tension is within adjuster range; if adjusters are near end of travel, plan belt replacement.
  • Inspect drive and idler pulleys for groove wear or buildup; verify set screws and keys are secure and there is no wobble.
Every 5,000 trays
  • Re-validate seed weight calibration on a representative variety; update presets if drift is observed.
  • Inspect shafts and drive engagement features for polishing, flats, or play; replace worn shafts.
  • Inspect the roller connection point where it mates with the motor shaft coupler for rounding, slop, or wear; replace the roller if wear is present.
  • Inspect the conveyor bearings. We want to be sure that the inner core of the bearing is intact, and the shaft is supported.
Every 25,000 trays
  • Evaluate main conveyance belt and replace if glazing, edge fray, splice lifting, or persistent slip remains after tracking and tension adjustments.
  • Verify all enclosure and guard fasteners torque; replace damaged hardware.
As needed
  • Replace seed rollers that no longer meter consistently after cleaning and recalibration.
  • Replace the tray sensor if detection is erratic after cleaning, alignment, and cable checks.
  • Replace pulleys showing groove rounding, cracking, or hub loosening.
  • Replace damaged wiring and connectors.
Notes
  • All bearings are sealed and are not to be greased.
  • Do not use chlorinated cleaners.
  • Do not use a pressure washer.

Technical specifications

Features

  • Precision Seeding: Ensures consistent seed distribution for increased yield
  • Adjustable Settings: Choose from 50 roller speed levels and 25 belt speed levels, with customizable start and stop times for all features
  • User-Friendly Interface: Features presets for plug-and-play operation
  • Versatile Roller Options: Suitable for various seed types
  • Durable Construction: Built to withstand long-term use
  • Energy Efficient: Low power consumption
  • Low Maintenance: Easy to maintain, clean, and store
  • Adaptable Design: Supports additional tray receivers for expanded capacity

Physical specifications

Overall unit L x H x W (in)67 x 25.25 x 22
Overall unit L x H x W (mm)1701.8 x 641.35 x 558.8
Drive unit length (in) [mm]47 [1193.8]
Tray receiver length (in) [mm]21 [533.4]
Weight75lbs (34kg)
MaterialALUMINUM
Tray compatibility1020 GROW TRAYS UP TO 3" TALL

Input power requirements

Voltage110V AC
Peak amperage20A
Avg. amperage6A
Avg. power consumption660W
ApplicationsMicrogreens
Baby greens
Micro herbs
Available add-onsPre-seed watering bar
Post-seed misting bar
Booster pump kit (bucket feed)

Certification

This machine is CE certified.

Customer support

For additional assistance, troubleshooting or questions about your Tabletop Seeder, our team is here to help. Please contact us at: