









User Manual · Original Instructions

Tabletop Harvester

Machine Automatic blade height adjustment Trays Up to 530 × 320 mm, up to 95 mm tall
Before you startPart 1 of 4

Introduction

Thank you for choosing the Rooted Robotics Tabletop Harvester. Designed to cut any crop in a 310x530mm tray, this machine streamlines the harvesting process, improving efficiency, consistency, and ease of use. Built with durability and adaptability in mind, the Tabletop Harvester is a useful tool for controlled environment agriculture operations of any scale. With an angled cutting design that utilizes gravity for product collection, and automatic blade height adjustment, the harvester eliminates the need for complex collection systems and manual adjustments. The result is a user-friendly machine that minimizes labor costs and enhances product quality while ensuring a fast return on investment.

This manual will guide you through setting up the harvester, adjusting cutting height and belt speed, and maintaining the machine for optimal performance. By automating the harvesting process, the Tabletop Harvester reduces manual labor, increases processing speed, and ensures a consistent, high-quality harvest across every tray.

Product overview

The Rooted Robotics Tabletop Harvester arrives mostly assembled, requiring minimal setup to begin use. Simply unbox the machine, remove any packing materials, connect the electronics box, and reconnect the motor cables before plugging it in to start harvesting. With intuitive controls, operators can quickly adjust blade and belt speed to suit different crop types and tray configurations, making the harvester a flexible solution for diverse farming operations. The machine’s simple design allows for easy cleaning and maintenance, with replaceable, off-the-shelf blades ensuring long-term affordability and reliability.

Key benefits

Using the Tabletop Harvester offers multiple benefits to your farm, providing a quick return on investment and significant labor savings:

  • Fast ROI: The automation of harvesting tasks reduces labor costs and time spent on manual cutting, allowing farmers to see rapid returns on their investment.
  • Consistent Harvest Quality: Adjustable settings ensure precise cuts and uniform product collection, improving overall quality and reducing waste.
  • Ease of Use: The intuitive control dial allows operators to quickly adjust settings and blade height, reducing training time and ensuring seamless integration into farm workflows with multiple tray sizes.
  • Durability and Low Maintenance: Constructed with robust materials and off-the-shelf components, the harvester is designed for long-term use with minimal upkeep.

How this manual helps

This manual is designed to guide you through the setup of your Tabletop Harvester. It provides essential steps to get your machine operational, including blade height adjustment, belt speed settings, and initial test runs. However, achieving the best results will require further fine-tuning based on your specific crops and workflow. By actively adjusting and testing different settings, you will optimize your harvester’s performance for maximum efficiency and consistent, high-quality harvests. Regular maintenance and calibration will ensure long-term reliability and minimal downtime.

About us

Rooted Robotics is committed to providing innovative automation solutions for controlled environment agriculture. Our team of engineers, designers, and industry experts works to develop affordable and effective tools that empower growers to operate more efficiently and profitably. With our expertise in automation and farm operations, we are dedicated to equipping farms with intelligent, interfacing machines that enhance productivity and sustainability.

Intended use

The Tabletop Harvester is designed for cutting leafy greens, microgreens, baby greens, and mushrooms grown in standard 1020 grow trays (up to 3 inches tall) in controlled environment agriculture facilities.

Intended OperatorsTrained Adult operators in commercial agriculture settings.
Intended EnvironmentIndoor, dry, temperature-controlled facility with appropriate electrical supply.
Operating Limits110V AC (US), 230V AC (EU).
  • Do NOT use for cutting wood, meat, bone, or any material other than soft plant matter in grow trays.
  • Do NOT operate with guards removed or safety devices disabled.
  • Do NOT use outdoors or in wet conditions.
  • Do NOT use with trays exceeding 3 inches in height or non-1020 format trays.
  • Do NOT operate the machine without reading this manual and watching setup videos.
  • Do NOT allow untrained or unsupervised persons to operate the machine.

Safety information

Signal Words and Symbols

DangerIndicates a hazardous situation that, if not avoided, will result in death or serious injury.
WarningIndicates a hazardous situation that, if not avoided, could result in death or serious injury.
CautionIndicates a hazardous situation that, if not avoided, could result in minor or moderate injury.

Residual Risk Warnings

  • Blade contact is still possible during blade changes and maintenance, even with no power present at the blade.
  • Pinch points exist at the conveyor belt and rollers. Keep hands, hair and loose clothing clear of the belt feed area during operation.
  • The machine contains voltages up to 110V AC (US) or 230V AC (EU) internally. Do not open the control panel enclosure.

Recommended Personal Protective Equipment (PPE)

  • Cut resistant gloves for normal operation, blade inspection, blade changes, and manual blade tracking checks.
  • Safety Glasses for normal operation, cleaning with compressed air, cleaning with sanitizers.
  • Hearing protection for extended blade operation and compressed air use.
  • Closed toed shoes for all stages of machine life cycle.

Emergency Stop

  • The E-stop button is located in the middle of the control panel, between the soft kill switch and the control dial. The e-stop has a bright red mushroom head with a yellow background making it easily identifiable.
  • To activate the E-stop, press it in firmly. Upon this press all motor power is cut from the machine with the blade stopping immediately.
  • To reset the machine, twist the E-stop button clockwise to release. The machine will NOT restart automatically, the operator must initiate a deliberate restart sequence.
  • The E-stop should be used any time an unsafe condition is observed, when any injuries occur, or at any point the operator feels unsure about the machine behavior. The E-stop must also be activated for routine cleaning and maintenance.
The soft kill switch is not the E-stop

The soft kill switch stops the blade and conveyor without interrupting power: the screen stays on and the motor lights stay green. Use it to stop the blade and conveyor temporarily. Use the emergency stop for permanent machine shut down or maintenance procedures.

Transport, handling and storage

  • Always use designated lifting points and grip locations.
  • Machine mass: 130lbs (59kg) – requires minimum two (2) people and/or mechanical aid to lift.
  • Dimensions: 51 x 36 x 36 in (1295 x 915 x 915 mm)
  • WARNING: Sharp edges and blade inside packaging – wear cut resistant gloves during unpacking and setup.
  • Stability requirements for work surface: minimum surface dimensions, weight capacity >200lbs, level, non-slip.
  • Storage conditions: indoor, dry, ambient temperature, blade detensioned for long-term storage.
  • Clear workspace of tripping hazards (packaging materials) before positioning machine.

Workstation

  • The Operator(s) for the tabletop harvester machine should place the harvester at a comfortable working height, with the tray intake belt located around chest level. Ensure the harvester is located on a stable surface.
  • The operator(s) should be located at the infeed side of the machine when loading trays into the harvester and the outfeed side when collecting the harvested trays.
  • When placing 1020 trays onto infeed belt, operator should NOT manually push trays towards the blade, instead allowing the conveyor to catch trays and direct them towards blade.
  • Allow multiple feet of space between the machine and all walls or other machinery to allow for smooth operation, maintenance and cleaning.
  • Before operation of the machine, ensure no untrained bystanders are in the operating zone of the machine.
Setting upPart 2 of 4

Setup and calibration

The Rooted Robotics Tabletop Harvester arrives mostly assembled, requiring minimal setup to begin use. Follow these steps to properly set up and calibrate your machine:

  1. Unbox the harvester and remove any and all packing materials.
  2. Place the harvester on a stable surface.
  3. Bolt on the tray extension guide and tray insertion guide if desired for operation. Hardware is included. Extension gusset bolts to existing bolts on the side of the harvester, these nuts must be unscrewed to mount gusset to the same bolts.
  4. Remove the blade cover and wearing protective gloves, manually spin the bandsaw wheels to ensure the blade is still tracking correctly. See the Blade Removal, Replacement and Alignment video.
  5. Mount blade cover with thumb screws and set to desired height (lowest height recommended for most crops).
  6. Mount separation plate gusset to the bandsaw spine, and then mount the separator plate to the machine.
  7. Plug in quick connect hoses to lower and upper air bars, and connect it to the 6-8 bar air supply. Open ball valves to allow air to flow through bars.
  8. Plug in the machine and power it on.
  9. Adjust the blade height according to the crop type by choosing the setting of the desired cut height on the dial. Numbers go from 0 to 70, and correspond to heights of 30mm to 100mm above the bottom of the tray (dictated by the minimum tray height specification and largest crops).
  10. To dial in blade heights for each recipe, choose a height, and check the blade height above an empty tray of the same size. The use may fine tune this height by changing the setting in the recipe.

Test runs and fine-tuning

  1. Start the belt and gradually increase speed by adjusting the control dial. Note: some amount of belt vibration without a tray present is normal.
  2. Stop the belt.
  3. Start the blade on the “Low” setting and allow it to run for 30 seconds to 1 minute to ensure it is still tracking correctly.
  4. Increase the blade speed first to “low” and allow it to run for 30 seconds to 1 minute, then do the same on “high”. If the blade comes off at any point, hit the emergency stop and see our Blade Removal, Replacement and Alignment video.
  5. Run a test tray through the harvester to evaluate the cut quality and belt speed.
  6. Fine-tune the blade height and belt speed as necessary until achieving a clean and consistent cut.
  7. Repeat the test three times to confirm accuracy before beginning full-scale operation.
  8. To use the air knives, adjust the air knife setting to lower, upper, both, or none, based on the desired operation. To switch to the blower attachment instead, unscrew the quick connect fitting, and attach the blower fitting in the box. Connect the hose to the barb, and the blower to hose custom attachment to the other end. Be sure to switch the setting to “lower only” for the air knife mode, as the blower is separate.
  9. Following these steps will ensure optimal performance, consistent results, and minimal downtime in your harvesting operation.
OperatingPart 3 of 4
Reference

Every screen

Screens are numbered here for reference within this manual.

Loading screen
1Loading Shown while the machine boots
Belt Speed screen
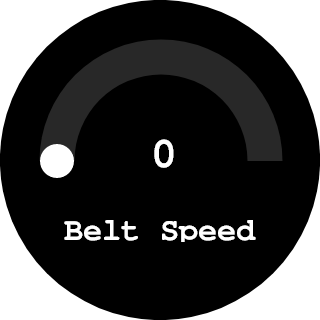
2Belt Speed How fast the tray moves
Blade Speed screen
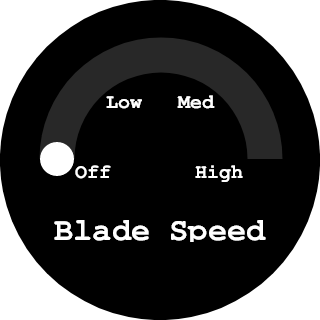
3Blade Speed Off, Low, Med or High
Variety Preset screen with Select
4Variety Preset Turn to a variety, then Select
Blade Height screen
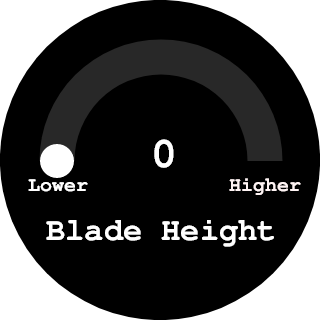
5Blade Height How high the blade cuts
Variety Selected screen
6Variety Selected Confirms the variety you chose
Variety screen with Edit and Home
7Edit Variety Choose which variety to change
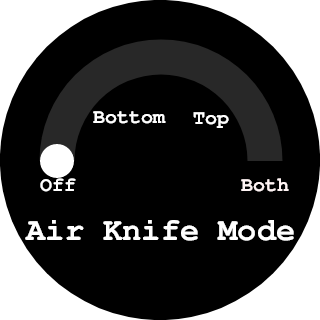
Air Knife Mode screen
8Air Knife Mode Off, Bottom, Top or Both
Loading Variety Preset screen
9Loading Variety Preset Fetching that variety’s settings
Edit Settings screen
10Edit Settings Opens the settings screens
Save Preset screen
11Save Preset Stores your changes to the variety
Variety Preset Saved confirmation
12Variety Preset Saved! Confirmation that it stored
Loading Previous Settings screen
13Loading Previous Settings Restoring what was last used

The four settings

Each setting has its own screen. Rotate the dial to change the value in the middle, then save your changes on the Save Preset screen.

Blade Height screen

Blade Height

Sets how high above the bottom of the tray the blade cuts. Numbers go from 0 to 70, and correspond to heights of 30mm to 100mm above the bottom of the tray. Turn toward Lower or Higher, and check the height above an empty tray of the same size before running a crop.

Blade Speed

Off, Low, Med or High. Start a new blade on Low for 30 seconds to a minute to confirm it is tracking correctly before going higher.

Belt Speed

Sets how fast the conveyor carries the tray into the blade, from 0 to 20. Some belt vibration without a tray present is normal.

Air Knife Mode

Off, Bottom, Top or Both. The air knives raise larger leafy greens for a better cut and help clear plant media from the collection plate. When using the blower attachment instead, set the air knife mode to the lower bar only, as the blower is separate.

Air Knife Mode screen

Varieties and presets

The harvester holds 20 variety presets, numbered 1 to 20. Each one remembers its own blade height, blade speed, belt speed and air knife mode.

  1. Turn to the variety you wantThe Variety Preset screen shows the number as you turn the dial.
  2. Press SelectThe screen reads Loading Variety Preset, then confirms which variety is selected.
  3. To change a variety, press EditChoose the variety to change, then Edit Settings to reach the four settings screens.
  4. Press Save PresetLook for Variety Preset Saved!. That confirmation is how you know it was written to the machine.
Variety Preset screen

PIN protection

Only on machines fitted with PIN protection

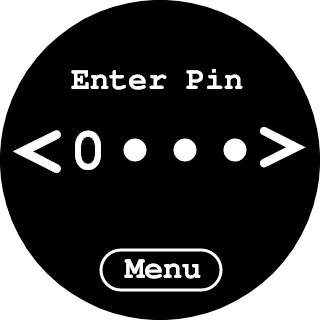
Some harvesters are supplied with PIN protection on the control dial, which keeps settings from being changed by anyone without the code. If your machine does not ask for a PIN, this section does not apply to it and the rest of the manual is unaffected.

Enter Pin screen
Enter Pin Turn to set each digit, then move along
Incorrect Pin screen
Incorrect Pin Press Retry and enter it again
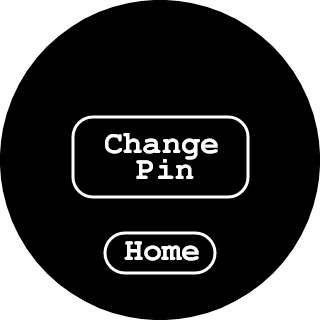
Change Pin screen
Change Pin Starts setting a new code
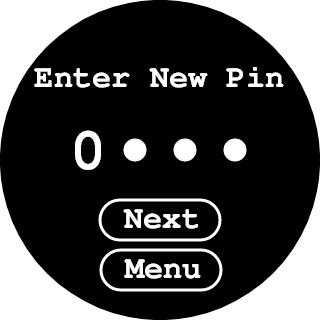
Enter New Pin screen
Enter New Pin Set each digit, then Next
New Pins Do Not Match screen
New Pins Do Not Match The two entries differed. Retry
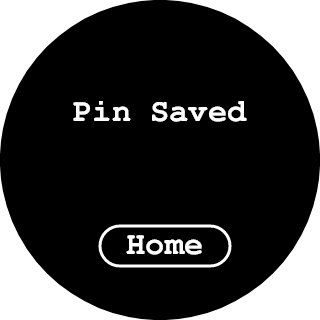
Pin Saved screen
Pin Saved The new code is stored
Keep a record of the PIN

A machine whose PIN is unknown cannot have its settings changed on the dial. Contact Rooted Robotics if the code is lost.

Care and referencePart 4 of 4

Cleaning procedures

Caution

Always be sure that the e-stop is engaged before interacting with the machine for cleaning and maintenance.

Purpose

Keep all food contact surfaces visibly clean during use and thoroughly cleaned after use to protect product, quality and safety. Failure to clean the machine as instructed can result in oxidization, premature wear of components, as well as significant risk of food pathogen propagation.

Approved agents and methods

  • Use potable water, food grade detergents, peroxide or peracetic acid based sanitizers. Mix and apply as directed on the label.
  • Do not use chlorinated cleaners.
  • Wipe with a cloth or hose down with a handheld nozzle. Do not use a pressure washer.

Routine cleaning during operation

Every 200 trays or once per harvest day, whichever comes first.

  1. Clean blade, produce separator plate, and bandsaw housing to remove plant residue. Use a food surface sanitizer to wipe down the produce separator plate. Remove the four thumb-screws to detach the separator plate assembly from the harvester to make cleaning easier. Remove the separator plate and clean the harvest blade: use a rag saturated with food grade sanitizer to pinch the blade, edge facing away from your hand, and feed the blade through the rag until the full circumference has been cleaned.
  2. Use compressed air to blow out debris from the blade housing. Remove the thumb screws that attach the blade cover to the harvester band saw spine, wipe out the blade cover to remove debris, then use an air compressor, can of compressed air, or electric blower to remove plant and media debris from the band saw spine.
  3. Use an air compressor, can of compressed air, or electric blower to blow out debris from the tray support rails.
  4. Use an air compressor, can of compressed air, or electric blower to blow out debris that has accumulated in the conveyor trough.

Daily cleaning post-harvest

  1. Perform all cleaning processes outlined in the routine cleaning section above.
  2. Clean the main drive belts and pulleys. Clean the white drive belts by wiping down the smooth surface with a rag with food surface sanitizers. Clean the toothed face of the belts with a garden hose using a jet hose attachment to spray down the belt. This is most easily done by running the belt, keeping the blade off, as you hose down the machine. Clean the primary drive pulleys using a garden hose and jet hose attachment.

Deep cleaning (as needed)

  • Remove the product separator plate for access under the plate; clean mounting points and tray path.
  • Remove blade cover; detension, remove and clean blade.
  • Remove debris trapped behind guards and within the blade housing.

Do and do not

  • Do keep food contact parts clean before, during, and after operation.
  • Do run the belt while spraying it to move debris off.
  • Do avoid direct spray at bearings, motors, and the electronics box.
  • Do not use chlorinated cleaners.
  • Do not use a pressure washer.

Maintenance and replacement intervals

Before each use
  • Inspect blade tracking and make sure the blade is tensioned before use.
  • Verify control functionality. The soft kill switch should stop the blade and conveyor without interrupting power: the screen should stay on and the motor lights should remain green. The emergency stop should power down the motors and the screen, shown by the motor lights turning off and the screen turning off.
  • The Touch Encoder allows for blade speed (off, low, medium, and high) and conveyor speed selection (0-20).
End of each harvest day
  • Remove the blade cover by first removing the thumb screws, detension the blade, and remove the blade for cleaning. Clean inside the blade housing.
  • Clean internals of the spine with compressed air or blower, then hose and sanitize accessible areas. Check the tensioner for loose screws and shaft wear. Check the blade drive belt for wear. Clean any debris out of the blade drive pulley.
  • Remove the produce separator plate by removing the four thumb screws and clean the separator plate.
  • Clean conveyance belt, conveyance pulleys, and conveyor frame.
Every 5,000 trays
  • Replace and or sharpen the blade. Knife edge blades may be sharpened; replace if nicked, kinked, or if tray collision otherwise damaged the blade.
Every 25,000 trays
  • Check components on the conveyance system (conveyor tensioners, shaft collars, and motor coupler) to look for loosening over time.
  • Inspect blade transfer belt for signs of wear, replace if necessary. Check tensioner mechanism and blade wheel shafts to make sure nothing is loosening.
  • Inspect conveyor belt tracking and splice condition. Adjust tracking if needed. Replace belt if splice damage or persistent slipping is observed.
Every 100,000 trays
  • Replace the bearings that house the shafts. All bearings are sealed and never require greasing.

Troubleshooting and emergency procedures

If the machine does not operate as expected, consult the guidance below. If the issue persists after following the recommended actions, stop the machine, isolate power and contact Rooted Robotics for support.

A tray jams during normal operation
Something is obstructing the tray path.
Engage the E-stop and wait for the machine to come to a complete stop. Clear the jam manually while wearing cut resistant gloves.
The blade derails
Blade tracking or tension is out.
Engage the E-stop and wait for the machine to come to a complete stop. Refer to the blade alignment video for guidance on fixing the issue.
Unusual noise or vibration occurs
A moving component may be loose or worn.
Engage the E-stop and wait for the machine to come to a complete stop. Inspect moving components (wheels, belts, blades, motors) and ensure bolts are tight.
Restarting after an E-stop
The machine never restarts on its own.
Twist the red mushroom head to release the E-stop and resupply power to the machine. Use the control dial to select the desired speeds from the last operation.
A cut injury
Blade contact.
Press the E-stop immediately and apply direct pressure to the wound. Seek medical attention for any laceration that is deep, does not stop bleeding, or involves the hands or fingers.

Energy isolation procedure

  1. Press the E-stop.
  2. Unplug the power cord from the wall outlet.
  3. Keep the plug visible and within your line of sight while working.
  4. Verify the machine is de-energized: the control panel display should be dark and no motors should respond.

Decommissioning and disposal

When the machine is discarded, follow the listed End-of-Life procedures.

  • Safe shutdown and decommissioning procedure: E-stop, unplug, wait, de-tension blade, de-tension belt, remove blade, verify zero energy.
  • Safe blade disposal: wrap in cardboard, mark SHARP, metal recycling.
  • Electronics disposal: follow local WEEE/e-waste regulations.
  • Frame and structural components: aluminum recycling.
  • Transport safety during removal: same lifting requirements as installation.

Technical specifications

Features

  • Precision Harvesting: Consistently delivers precise cuts for maximum yield and quality.
  • Automatic Adjustable Blade Height: Allows for multiple tray heights to accommodate different crop profiles at the push of a button.
  • Customizable Belt & Blade Speed: Offers enhanced control over the process, including a very slow speed setting specifically for cleaning.
  • Dual Air Knife System: Improves cut for larger leafy greens by raising them, and aids removal of plant media from the collection plate.
  • User-Friendly: Features intuitive rotary controller and is engineered for easy in-place cleaning and sharpening, with simple removal and replacement for quick maintenance.
  • Durable & Energy-Efficient: Built for heavy-duty use with versatile blades to handle a range of leafy greens while operating on low power for reduced operational costs.
  • Low Maintenance: Wash-down rated and designed for hassle-free service and storage.

Physical specifications

Overall unit L x H x W (in)83.5 x 36 x 34
Overall unit L x H x W (mm)2120.9 x 914.4 x 863.6
Drive unit length (in) [mm]45.1 [1146.2]
Weight130lbs [58.97]
MaterialALUMINUM
Tray compatibilityUP TO 530mm x 320mm TRAYS, UP TO 95mm TALL

Input power requirements

Voltage220V AC
Peak amperage10A
Avg. amperage6A
Avg. power consumption750W
ApplicationsMicrogreens
Baby greens
Leafy greens

Customer support

For additional assistance or troubleshooting about your Tabletop Harvester, our team is here to help. Please contact us at: